AutoCAD 2011, my pick of the new (and borrowed) features
It’s the time of year when Autodesk unleash new versions and AutoCAD 2011 is available now. It’s time to start considering the new feature set and decide what you’ll implement, or avoid.
It’s about you, not the software?
There is little point upgrading, even a single workstation, if you don’t use the new features. Only a test drive can let you truly evaluate them. While doing that take the opportunity to take a step back and consider your current process. Can the new features assist, maybe even eliminate, your current workflow or techniques?
Although it’s difficult, forget those old habits while doing this. Often the quest to “make it like the old version” negates advantages a new technique or tool can bring. New isn’t always better, but either is old!
So, What Is New?
The New Features workshop is the best place to find out:
- If you’ve installed the application you’ve seen it already. If you dismissed it find it on the help button and have another look.
- It is also on-line at AutoCAD 2011 New Features Workshop (warning takes a while to download!)
My AutoCAD 2011 Picks, and this is just the 2D stuff;
This isn’t a comprehensive guide to all that’s new in AutoCAD 2011 but just a few things about the new release that caught my attention:
At last, edit a Polyline without gritted teeth.
![adt040428_02_space_grip[1] adt040428_02_space_grip[1]](https://www.robincapper.net/content/images/2025/10/mt_imported_image_1758667018-1.jpg)
As a long time AutoCAD Architecture user Polylines are still a much used AutoCAD object. They create the profiles that are the core of many ACA objects or can be converted to many types of ACA objects. Way back in the ADT 2004/5 era its space/area/slab objects gained delightful grip editable outlines which make adding nodes, curves, and offsets (edge or whole perimeter) a breeze (the image right is from my ADT 2005 post!).
Since this boundary looks & behaves very much like a polyline it’s no surprise to see these grips now available on the AutoCAD Polyline*. It’s a pity it took so long but better late than never!
Starting with a Polyline you can select a midpoint grip and stretch (current behaviour):
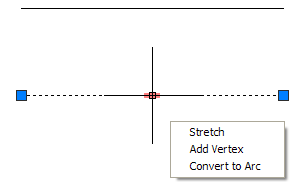
Hit control to add a new vertex node;
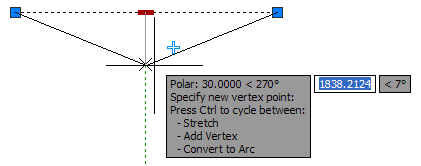
Hit control again to add a curve;
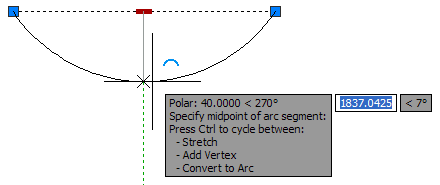
The result of those options;
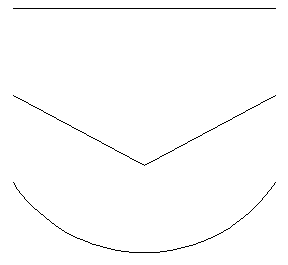
Adding and removing vertices is just as simple, just select & hit control to see a preview of the edit.
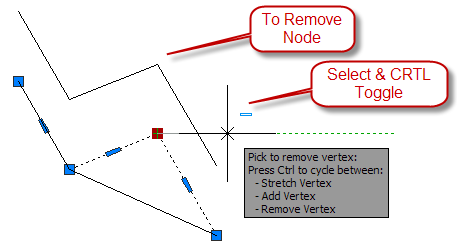
It’s now much easier to create a complex curved Polyline from a simple starting shape.
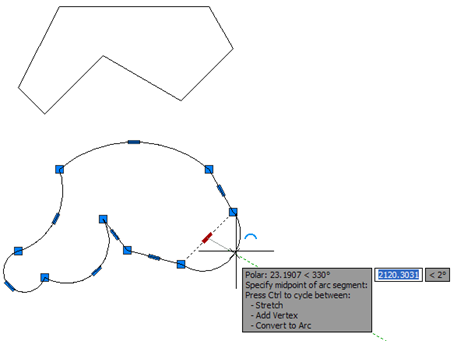
The (horrible) old PEDIT command is still there for those who like adding nodes the hard way, but check out these new grips.
* Now they need to be added to Revit’s Sketch lines…
Back to Black, well nearly black
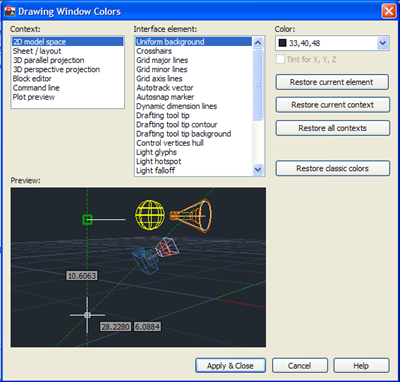
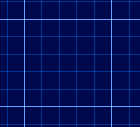
The default model space is now a nearly black 33,40,48 and the 2D Grid has the graph paper appearance (below right) previously seen in 3D mode. For those who prefer a white background (& I do) it’s a short trip to the options dialog to change the 2D Model Space setting.
The View’s a 2D Cube:
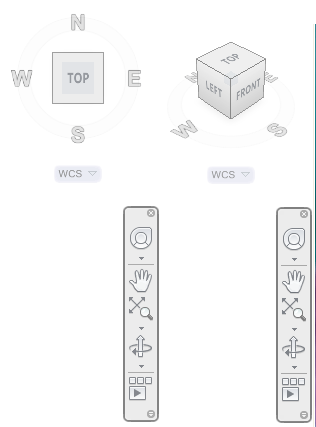
The view cube, formerly only a 3D UI item, can now be used in any mode. It’s also combined with an enhanced navigation bar with Wheel, Pan, Zoom and Orbit tools.
AutoCAD is Transparent now:
Yes, you can use the words “AutoCAD” and “transparency” in a sentence without needing “wish”! Transparency is supported as an object property like colour, linestyle, linetype.
It’s funny this arrives as the AutoCAD default model background is changed (back) to nearly black as transparency is best evaluated on a white background. Check it out in a layout or, like I will do, change your model space to white. Below you can see all solid hatches (left), blue & green with 50% transparency (middle) and all 50% transparency (right). The transparency honours colour (additive) and draw order differences but the background colour does impact the visual result.
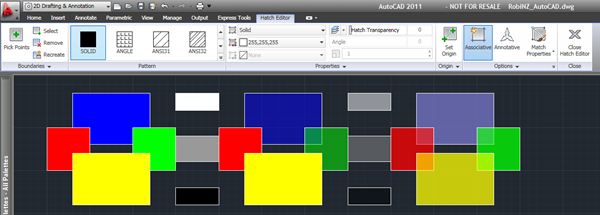
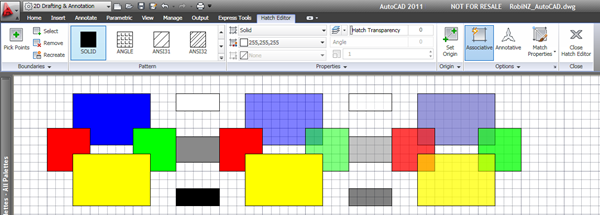
AutoCAD can apply transparency to an object or as a layer property for all objects that layer hosts. This can be set from the ribbon using a new, for this property only, fly-out to select what you’re adjusting, the object properties palette or the Layer Properties Palette.

If you hit plot preview and don’t see your delightful transparent objects in the preview there is a setting you need to change. Visit the Plot dialog and tick “Print Transparency”. It’s off by default which may seem a little odd but is done with good reason. Transparency, like gradient Hatches, can create large plot files and impact plotting speed. It’s a plot/file setting and best left off unless you need to use transparent objects. Material and Conceptual style transparency (like x-ray view) are not impacted by this setting.
Hatch:
Hatch gets a comprehensive update:
It also gets a comprehensive “creation” ribbon which exposes the settings seen in the old dialog.

Select Similar & Isolate Objects:
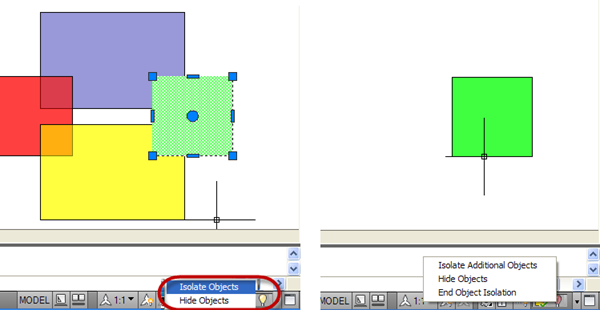
These long standing ACA commands arrive in core AutoCAD. Using these two you can select and work on complex object selections without the hassle of dealing with layers. Yes, I did just say that you can almost ignore layers in AutoCAD, for editing anyway.
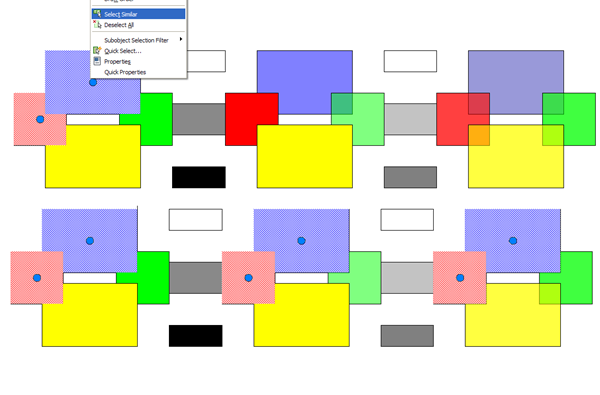
Select an object and Select Similar to select the rest. The settings dialog lets you decide how similar. Below shows red & blue hatch selected (top), then the resulting select similar with colour as a select similar criteria.
Isolate is an easy way to clear the decks to work on selected objects without needing to use layer control. Be aware that this is only temporary and (unlike ACA) isolated/hidden objects overrides are removed when the file is closed/opened again and ignored if the file is referenced (as Xref).
Inferred Constraints:
UPDATE 03/30/2010: I mistakenly called these Implied, instead of inferred, Constraints so fixed it. No press release copy/paste here! Just as well I didn’t call them Implied Paramedics…
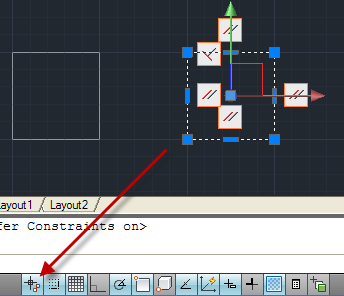
2010 introduced parametric constraints and 2011 makes them easier. Infer Constraints, a new toggle on the status bar, attaches logical constraints to geometry as you create it. The rectangle on the left was created with the toggle off. The same input with Inferred Constraints on created the constrained rectangle on the right. Choose when you use this to avoid excess or needless constraining!
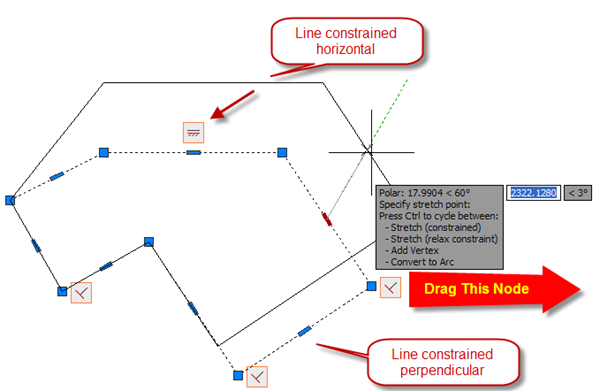
On a more complex shape you can see horizontal and perpendicular constraints, automatically created as I drew the geometry, being honoured as a node is dragged. It’s nice to see AutoCAD capturing design intent.
And, how could I not mention, an even better Ribbon!
There are some refinements to the Ribbon and even more contextual tabs.


If you must, and unlike some other platforms, “Classic” lives on as an optional UI choice…

Quite a few changes for a mature application and that’s just some the UI/2D stuff. Although some prefer to deny it AutoCAD is a fine 3D modeller and there have been major improvements in that department too. More on that in a future post.


